I let each of the kiddos cut out some egg shapes from water color paper, found here. Then handed them Crayola water colors ( there is no other brand in my opinion. These are vibrant and beautiful. Don't be cheap, use Crayola!) and some water. While group 1 was painting, the others where turning green paper in grass to hide the eggs in. Simple and colorful and festive!
~Praise the children and they will blossom~ Just a preschool teacher being grown by the kiddos in my life. I am blessed.
Showing posts with label kids craft. Show all posts
Showing posts with label kids craft. Show all posts
Friday, March 30, 2012
Easter Window Display
Water color paper, water color paints, some paper and scissors and you get this great Easter window display!
I let each of the kiddos cut out some egg shapes from water color paper, found here. Then handed them Crayola water colors ( there is no other brand in my opinion. These are vibrant and beautiful. Don't be cheap, use Crayola!) and some water. While group 1 was painting, the others where turning green paper in grass to hide the eggs in. Simple and colorful and festive!
I let each of the kiddos cut out some egg shapes from water color paper, found here. Then handed them Crayola water colors ( there is no other brand in my opinion. These are vibrant and beautiful. Don't be cheap, use Crayola!) and some water. While group 1 was painting, the others where turning green paper in grass to hide the eggs in. Simple and colorful and festive!
Friday, March 2, 2012
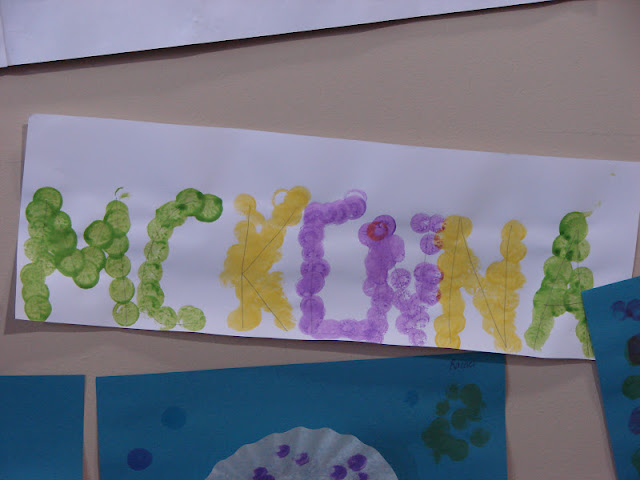
Dot Painter Names
I love these. They are bubbly and fun. They are happy. They are educational. They help little hands with the hand eye coordination. They help with name recognition. They help with name writing. They make the hallway bright and cheery.
I cut heavy over sized paper in half lengthwise. Lightly wrote each student's name in pencil. Provided a variety colors of dot painters and the kiddos did the rest. :) We hung them in the hallway. I think the kids like seeing their name. It makes it "their" school.
Need some dot painters? I highly recommend these.
Friday, February 3, 2012
Preschool: Making Butter
Shake, shake, shake, shake some more. When we made our butter in preschool... that is all there was to it. We filled a large size baby food jar halfway with heavy whipping cream. Each child shook the jar while the rest of the class counted to 20. Here is the cool part. We have 18 kids in that class. That is 18 times counting to 20 in a few minutes. It kept their attention. Towards the end, we even jumped while we counted. We can work on math, gross motor and science all in one little project. The kids really enjoyed this and I recommend it!
If you have not done this before, it takes about 5 or so minutes of good shaking to turn that cream into butter. I gave it a few vigorous shakes to help it along. Drain the buttermilk, and you have butter. I recommend salting it. If not it is really unappealing. Serve on crackers for a little taste!
Wednesday, January 25, 2012
Preschool: Decorated Names
When learning to write our names in preschool, I think it is important to take into consideration that you can learn how to write it with more than just a crayon or pencil. So when I begin to teach the kiddos how to write their name, I do this project with them. Now if you have 27 students like me, then this can take a good bit of prep time. To figure out how many of each letter I needed, I typed each child's name into a Word (or in my case, Pages) document. I type all names in CAPS, one name per line. Like this:
SARAH
KRISTY
JUSTIN
GRACE
BENJAMIN
etc. Then I start going through the alphabet and deleting each letter as I counted them. So after counting the As, it would look like this.
S R H
KRISTY
JUSTIN
GR C E
BENJAMIN
Note how many of each letter you need. Cut them out on a die cutter in various colors, glue them onto sheets of paper. I had to use masking tape to make my sheets long enough.
Provide the kids with glue and a tray of glitter, tissue paper, colored sand, colored rice, pasta, etc and let them decorate their names.
Touch, Feely Names! :)
Monday, January 23, 2012
Preschool: DIY Snow Globes
We make snow globes every year in preschool during our weather unit. I have always wanted to put the kiddos photos inside the globe. So I decided to give it a whirl. ( Get it whirl, like snow globes whirl around... haha... ok not that funny)
Remember these cute snow photos we did? Well, I made doubles and had my parent helpers cut them out as well. :) Then I laminated the pictures with my Scotch laminator. It does a "hard" finish. Not flimsy. I kinda love it. You should check out Amazon and get one. I cut out around the photos, leaving a bit of an edge, so the pictures are well sealed. I collected large jars, mostly spaghetti sauce size, then I jammed the laminated photos inside. No need to secure them with any type of glue, mine kinda stayed put. Even if they didn't, they would look cute whirling around in there.
We are working on name recognition and writing in preschool too! So I had these great letter beads from Discount School Supply.
I had the kids look at their name tag and find the letters of their first name. Then put them in the jar.
Then they added glitter and sequins!
Now, you fill the jar with water. You can add a few drops of glycerin to the water to help the glitter float a little more slowly through the jar. I did not bother with that part this time.
Make sure you have filled the jar to the brim with water so when it is turned upside down, the whole picture is underwater.
NOTE: You could also put the picture in the jar right side up, so when you put the lid on, you would not have to turn it upside down to see everything correctly. Does that make sense? I could not do this with most of my jars, because they had this funky little bubbled glass around the top that distorted the picture.
Dry the lids and rims of the jar well, add a bead of glue (either hot glue or a super glue) Screw the lids on being careful to get them threaded correctly. Let dry a few minutes, then Shake away!
The pictures just don't do it justice! :)
We used these during closing circle while reading the book "Snow Dance". Every time we read the word "Snow" the kiddos would make it snow in their globes!
Inspiration for laminating the photos came from this great site! Our Best Bites!
Wednesday, January 18, 2012
Preschool: Storming Clouds
Super simple craft project for our weather unit. I use this craft after our "Jesus Calms the Storm" story.
Cut out large cloud shape from easel paper.
Give each kiddo a few random squirts of black and white paint directly onto their cloud.
Have them mix them together with a paint brush and turn their happy cloud into a storm cloud!
To add the rain, purchase up those leftover Christmas icicle tinsel and tape a few strands to the back of the cloud after the paint is dry. ( this part can be extremely frustrating if you let the 3 and 4 year olds do it, so I had a parent volunteer do this part.) However, if you are feeling up to it, go ahead, let the little ones do it! :)
Saturday, January 14, 2012
Preschool: Music Center
We kicked off January with our story about "David, the Music Maker". We have begun to memorize our verse, Ps 101:1 Sing praises to the Lord. We talked about what 'praises' are: good things, kind and loving words, expressions of love and admiration. We talked about some ways we can praise the Lord through music. We can use our bodies to dance (David danced before the Lord!) Our mouths can sing praises and our hands can play an instrument (or be an instruments) to praise the LORD! Then we practiced those very things!
We also briefly talked about words like, staff, note, treble clef, and bass clef. We talked about how we where notes are located on a staff will tell us what key to play on the piano or what buttons to push on other instruments. We talked about how different looking notes tell us how long to play the note. I kept it very basic. Not too much detail. Just wanting to expose them to the concept. Then I came up with this little center.
We rolled freezer paper onto the back of our TT cabinet. Mrs. Knight drew a music staff on the freezer paper. One with a bass clef, one with a treble clef. We put out scissors, clipart music notes ( to be cut apart) and glue sticks. They kids created their own preschool song, and a beautiful art piece. LOVE IT!
Friday, December 23, 2011
All the Pretty Lights!
Christmas Lights
Two quick Christmas light crafts
Find or draw a Christmas light bulb. I got mine from the Pre K Mailbox magazine. You could google a pattern and draw it in black maker on white cardstock. Cut it out. Mix up some corn syrup paint. A squirt of clear (light) corn syrup and a few drops of food coloring. Simple and sticky! Paint the bulb with the shiny paint. It will take a few days to dry. It will be shiny just like a glass light bulb. Make a few and string them together and hang them from the wall or window. We put a sign with ours that said, “ Jesus is the Light of the World." I love the way it brightens up my classroom door! :)
Clean up is much easier than you may suspect. It wipes right off.
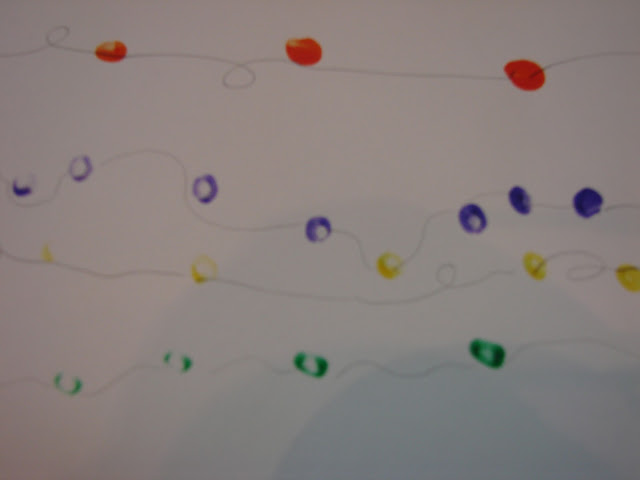
Another simple fun Christmas light craft, is to have your little one dip fingers into paint and make finger print lights all over a piece of card stock. After it is dry connect the lights with a fine tip sharpie. You can write:
" YOU LIGHT UP MY WORLD!"
On the inside and have the kiddos sign their names!
Christmas Card idea adapted from Teach Preschool
Fun and Done!
Thursday, December 15, 2011
B is for Berries
I {heart} google images. You can find any coloring page or clipart item you need. Image search for holly berry coloring pages. Find one you love and print it!
At Table Time this week I gave each kiddo a green crayon and some red finger paint that I laced with red glitter. They were given verbal instructions to color the leaves green and finger paint the berries red. They did great! :) Simple, fun and festive! :)
Thursday, October 27, 2011
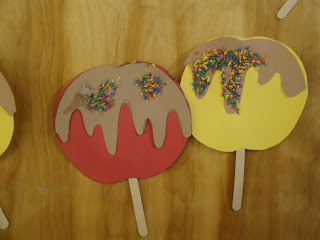
Caramel apple craft
Use wooden craft sticks, glitter, colored rice, paper hole punch scraps and whatever else you have laying around to create cute caramel apples! :) :) :)
Subscribe to:
Posts (Atom)


